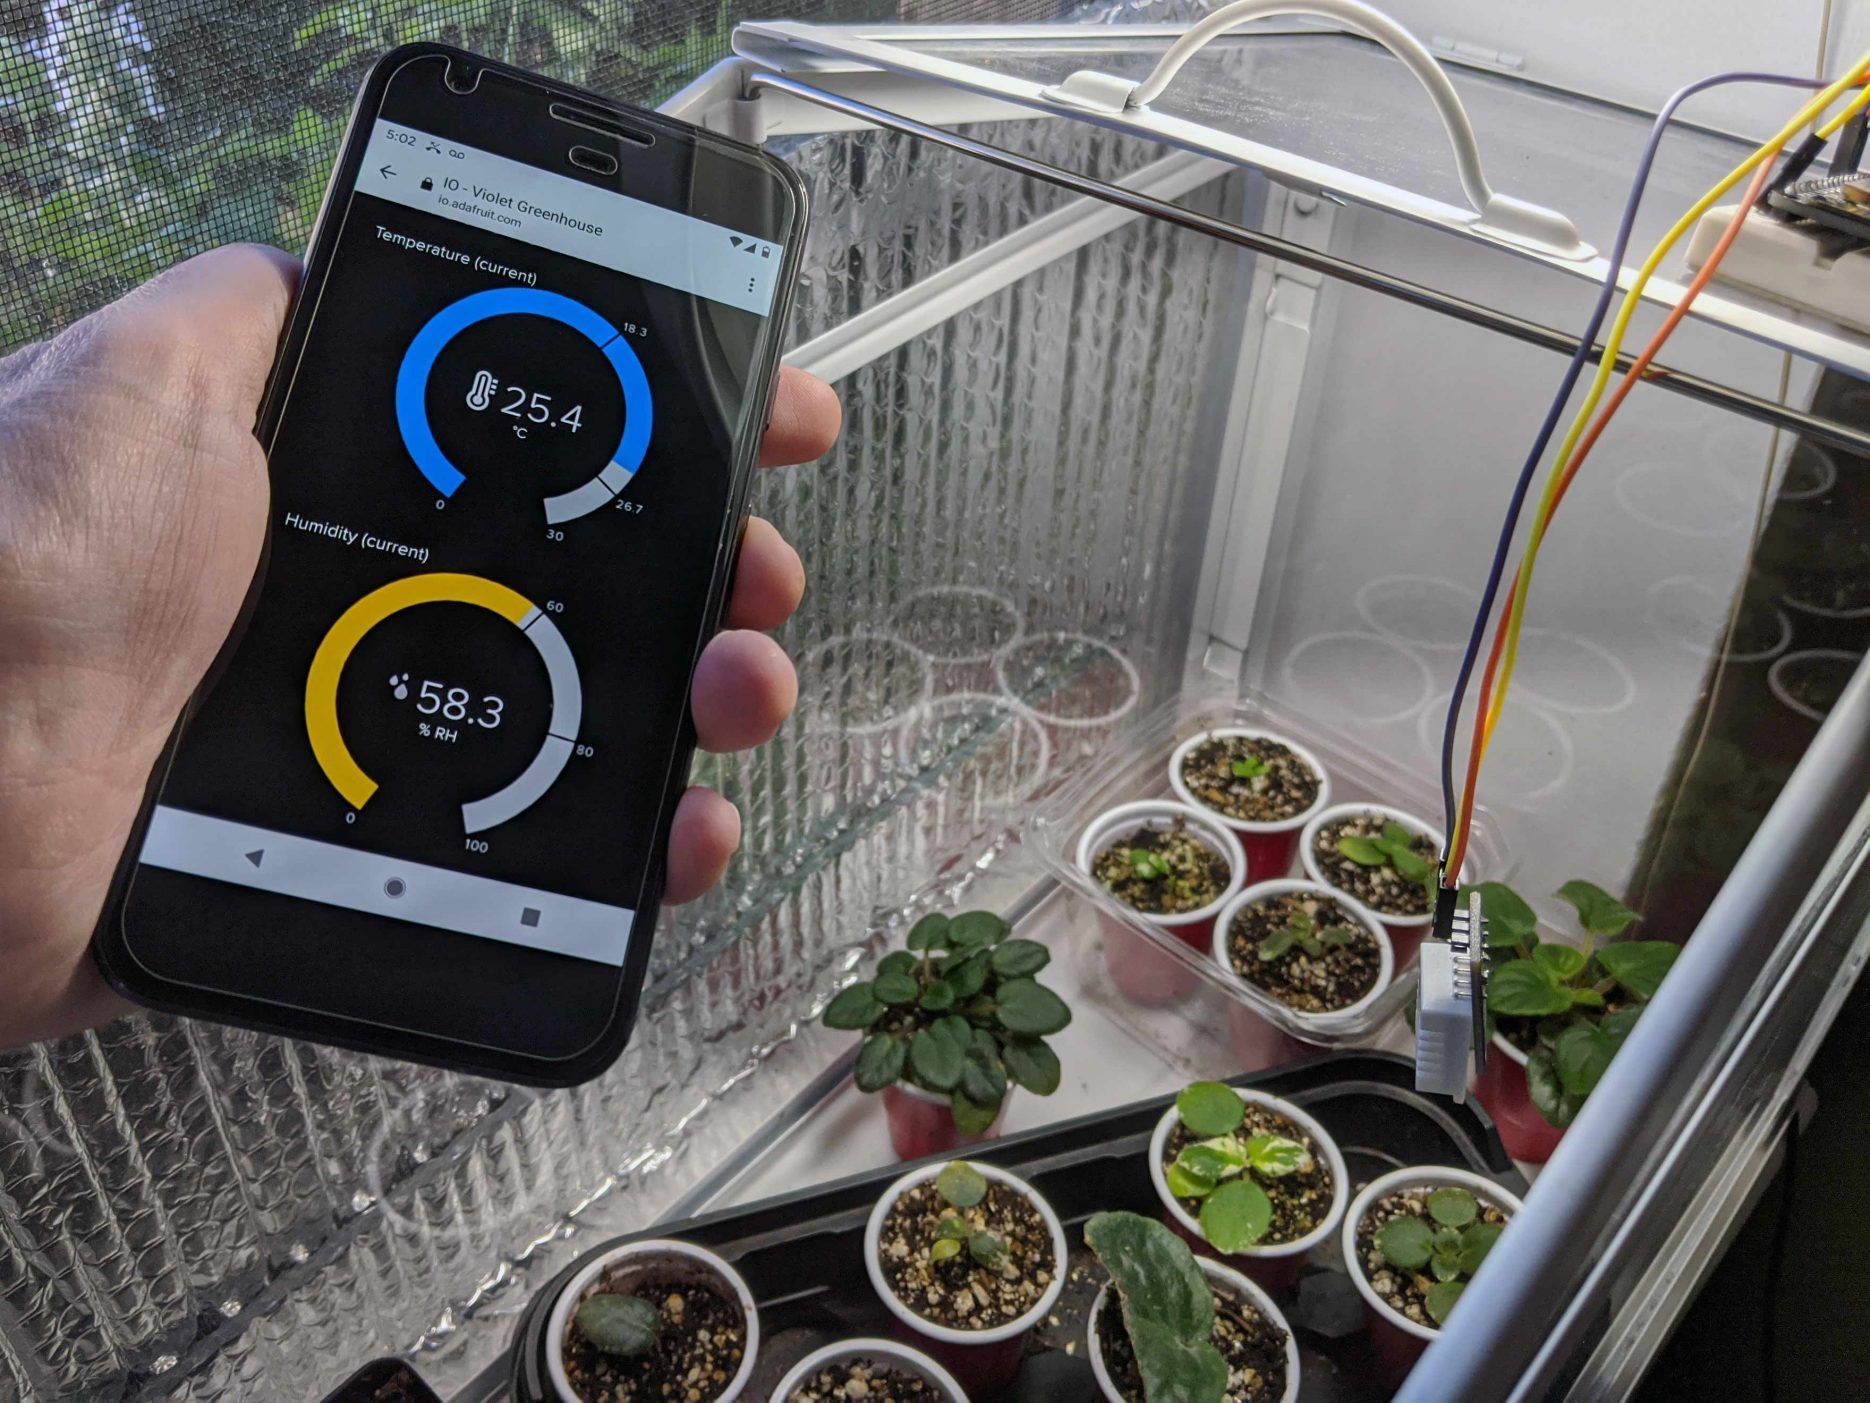
I grow African Violets in a small greenhouse. They’re picky, so I made a temperature and humidity monitoring system. Data is sampled several times a minute and visualized on a web-based dashboard. If it gets too hot or dry, the violets send a warning email. Data is tracked for 30 days so it’s easy to see patterns and improve conditions.
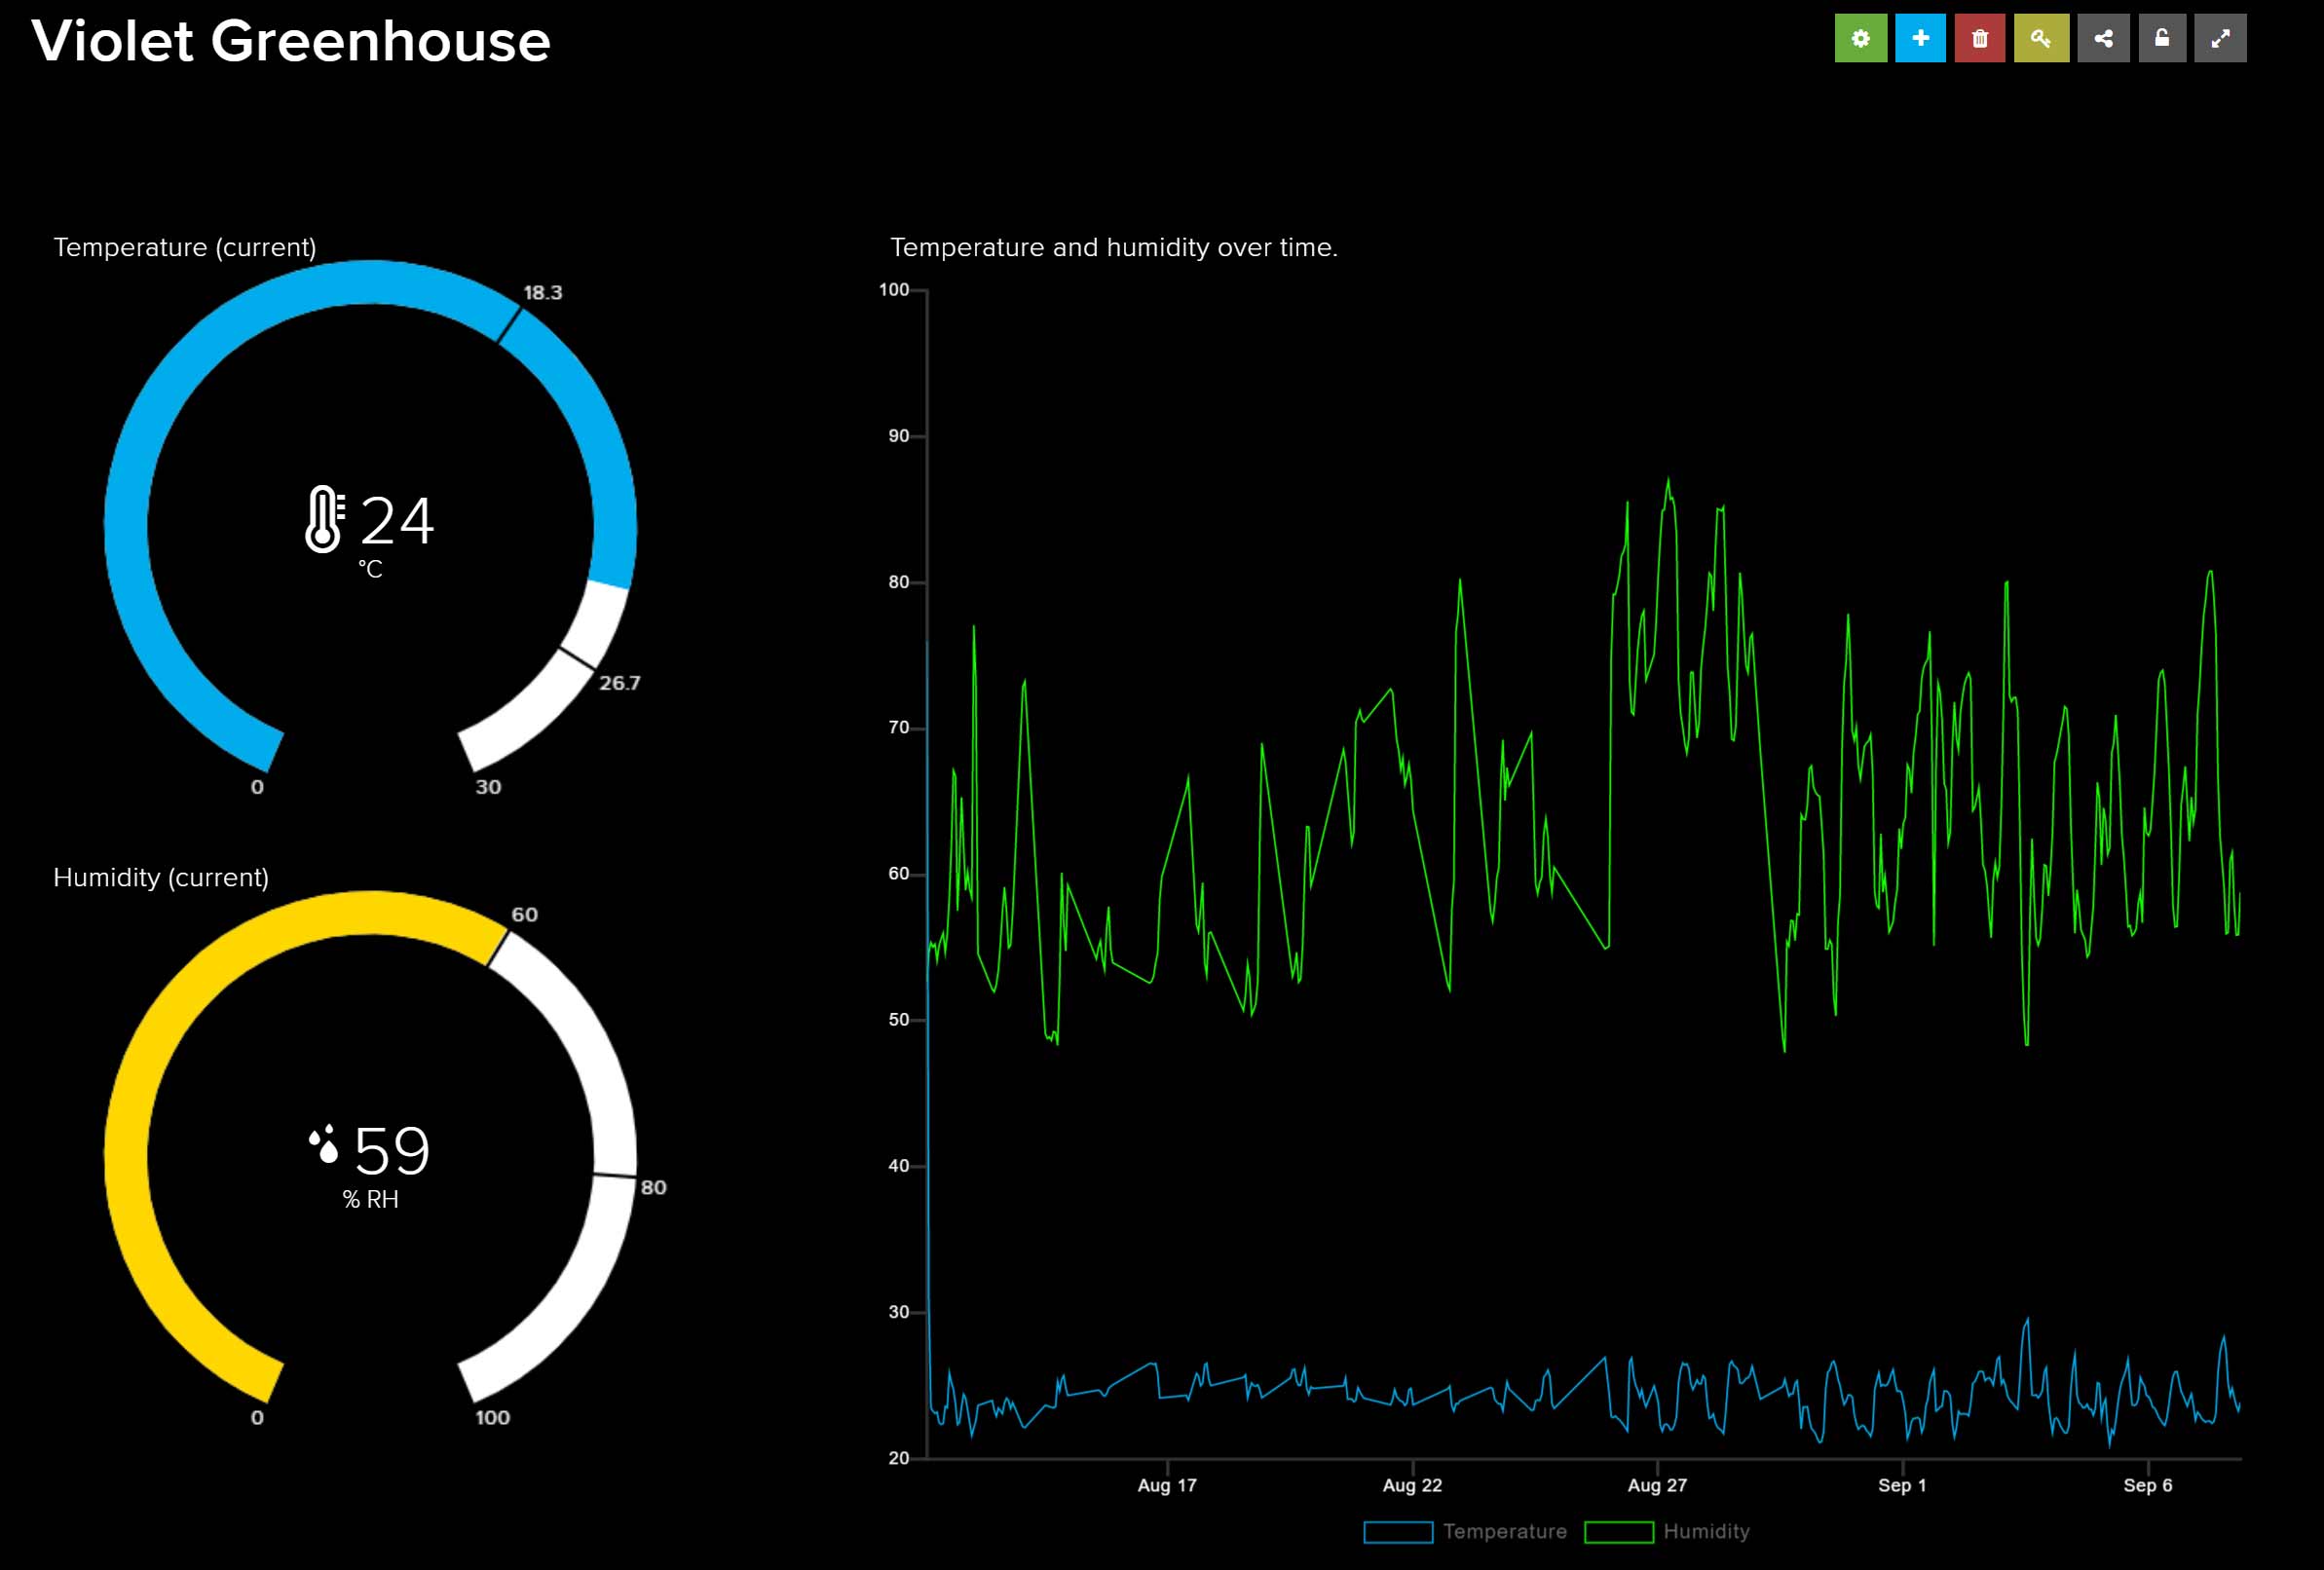
Dashboard Screenshot
How it Works
1. The Hardware
The DHT-22 Sensor (PDF) is a combined temperature and humidity sensor with a huge range (-40C – 80C, 0 – 100% RH). The sensor in this setup runs off a Node MCU dev board. The board runs Arduino C code and is easily programmed via USB with the Arduino IDE.
2. The Code
The Arduino C code instructs the hardware to take a reading from the sensor, print the result to the serial port, and also send it over the web to Adafruit.io. After a short delay, this process repeats. No data storage or analysis happens on the board. That’s where Adafruit.io comes in.
3. Data and Alerting
Adafruit.io saves and displays data in a customizable dashboard. There are some limitations at the free service tier, such as only 30 days of data storage, and rate-limiting to 10 samples per minute. It’s more than enough to get started though. Adafruit.io also sends out the data (as feeds) to IFTTT.com where alerting is set up. I use email notification but there are lots of options.
Instructions
Parts Required (Cost ~ $25)
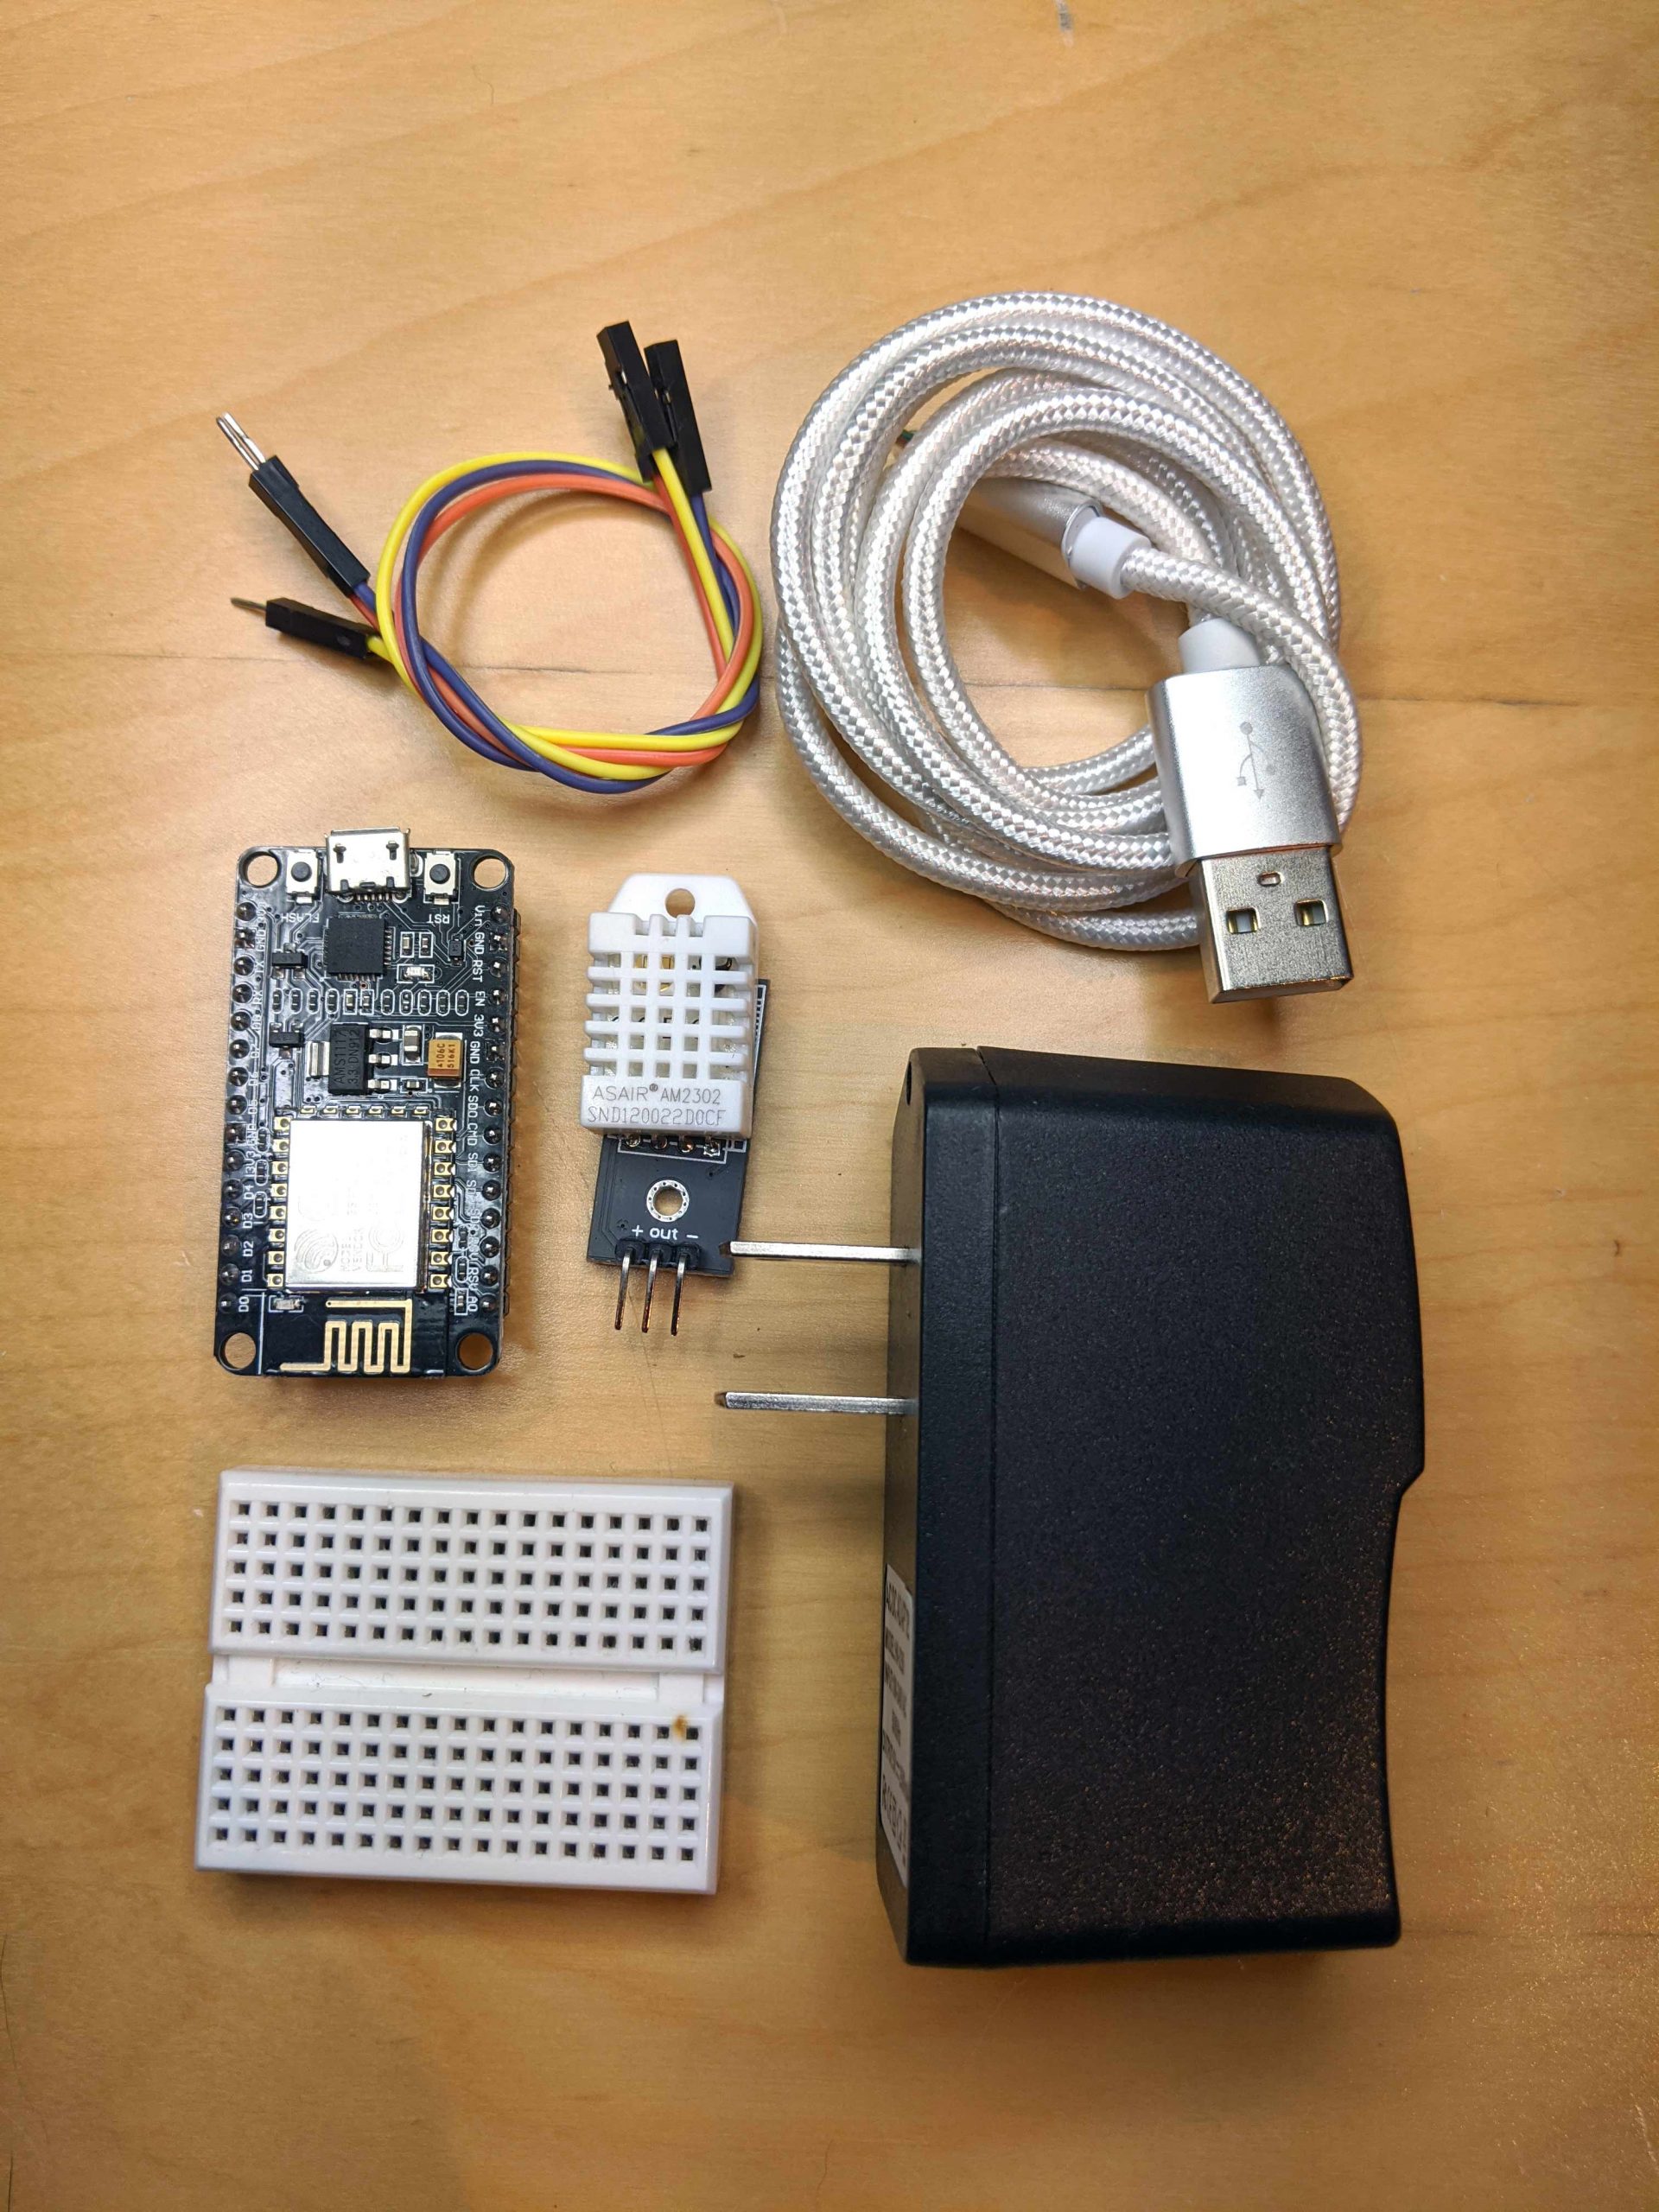
- Node MCU ESP8266 12E dev board (narrow to fit breadboard)
- DHT-22 temperature and humidity sensor
- Micro-USB A cable
- Breadboard and wires
- Optional: 5V USB power supply
My greenhouse is an Ikea Socker with an LED grow light which cost about $40 total.
Process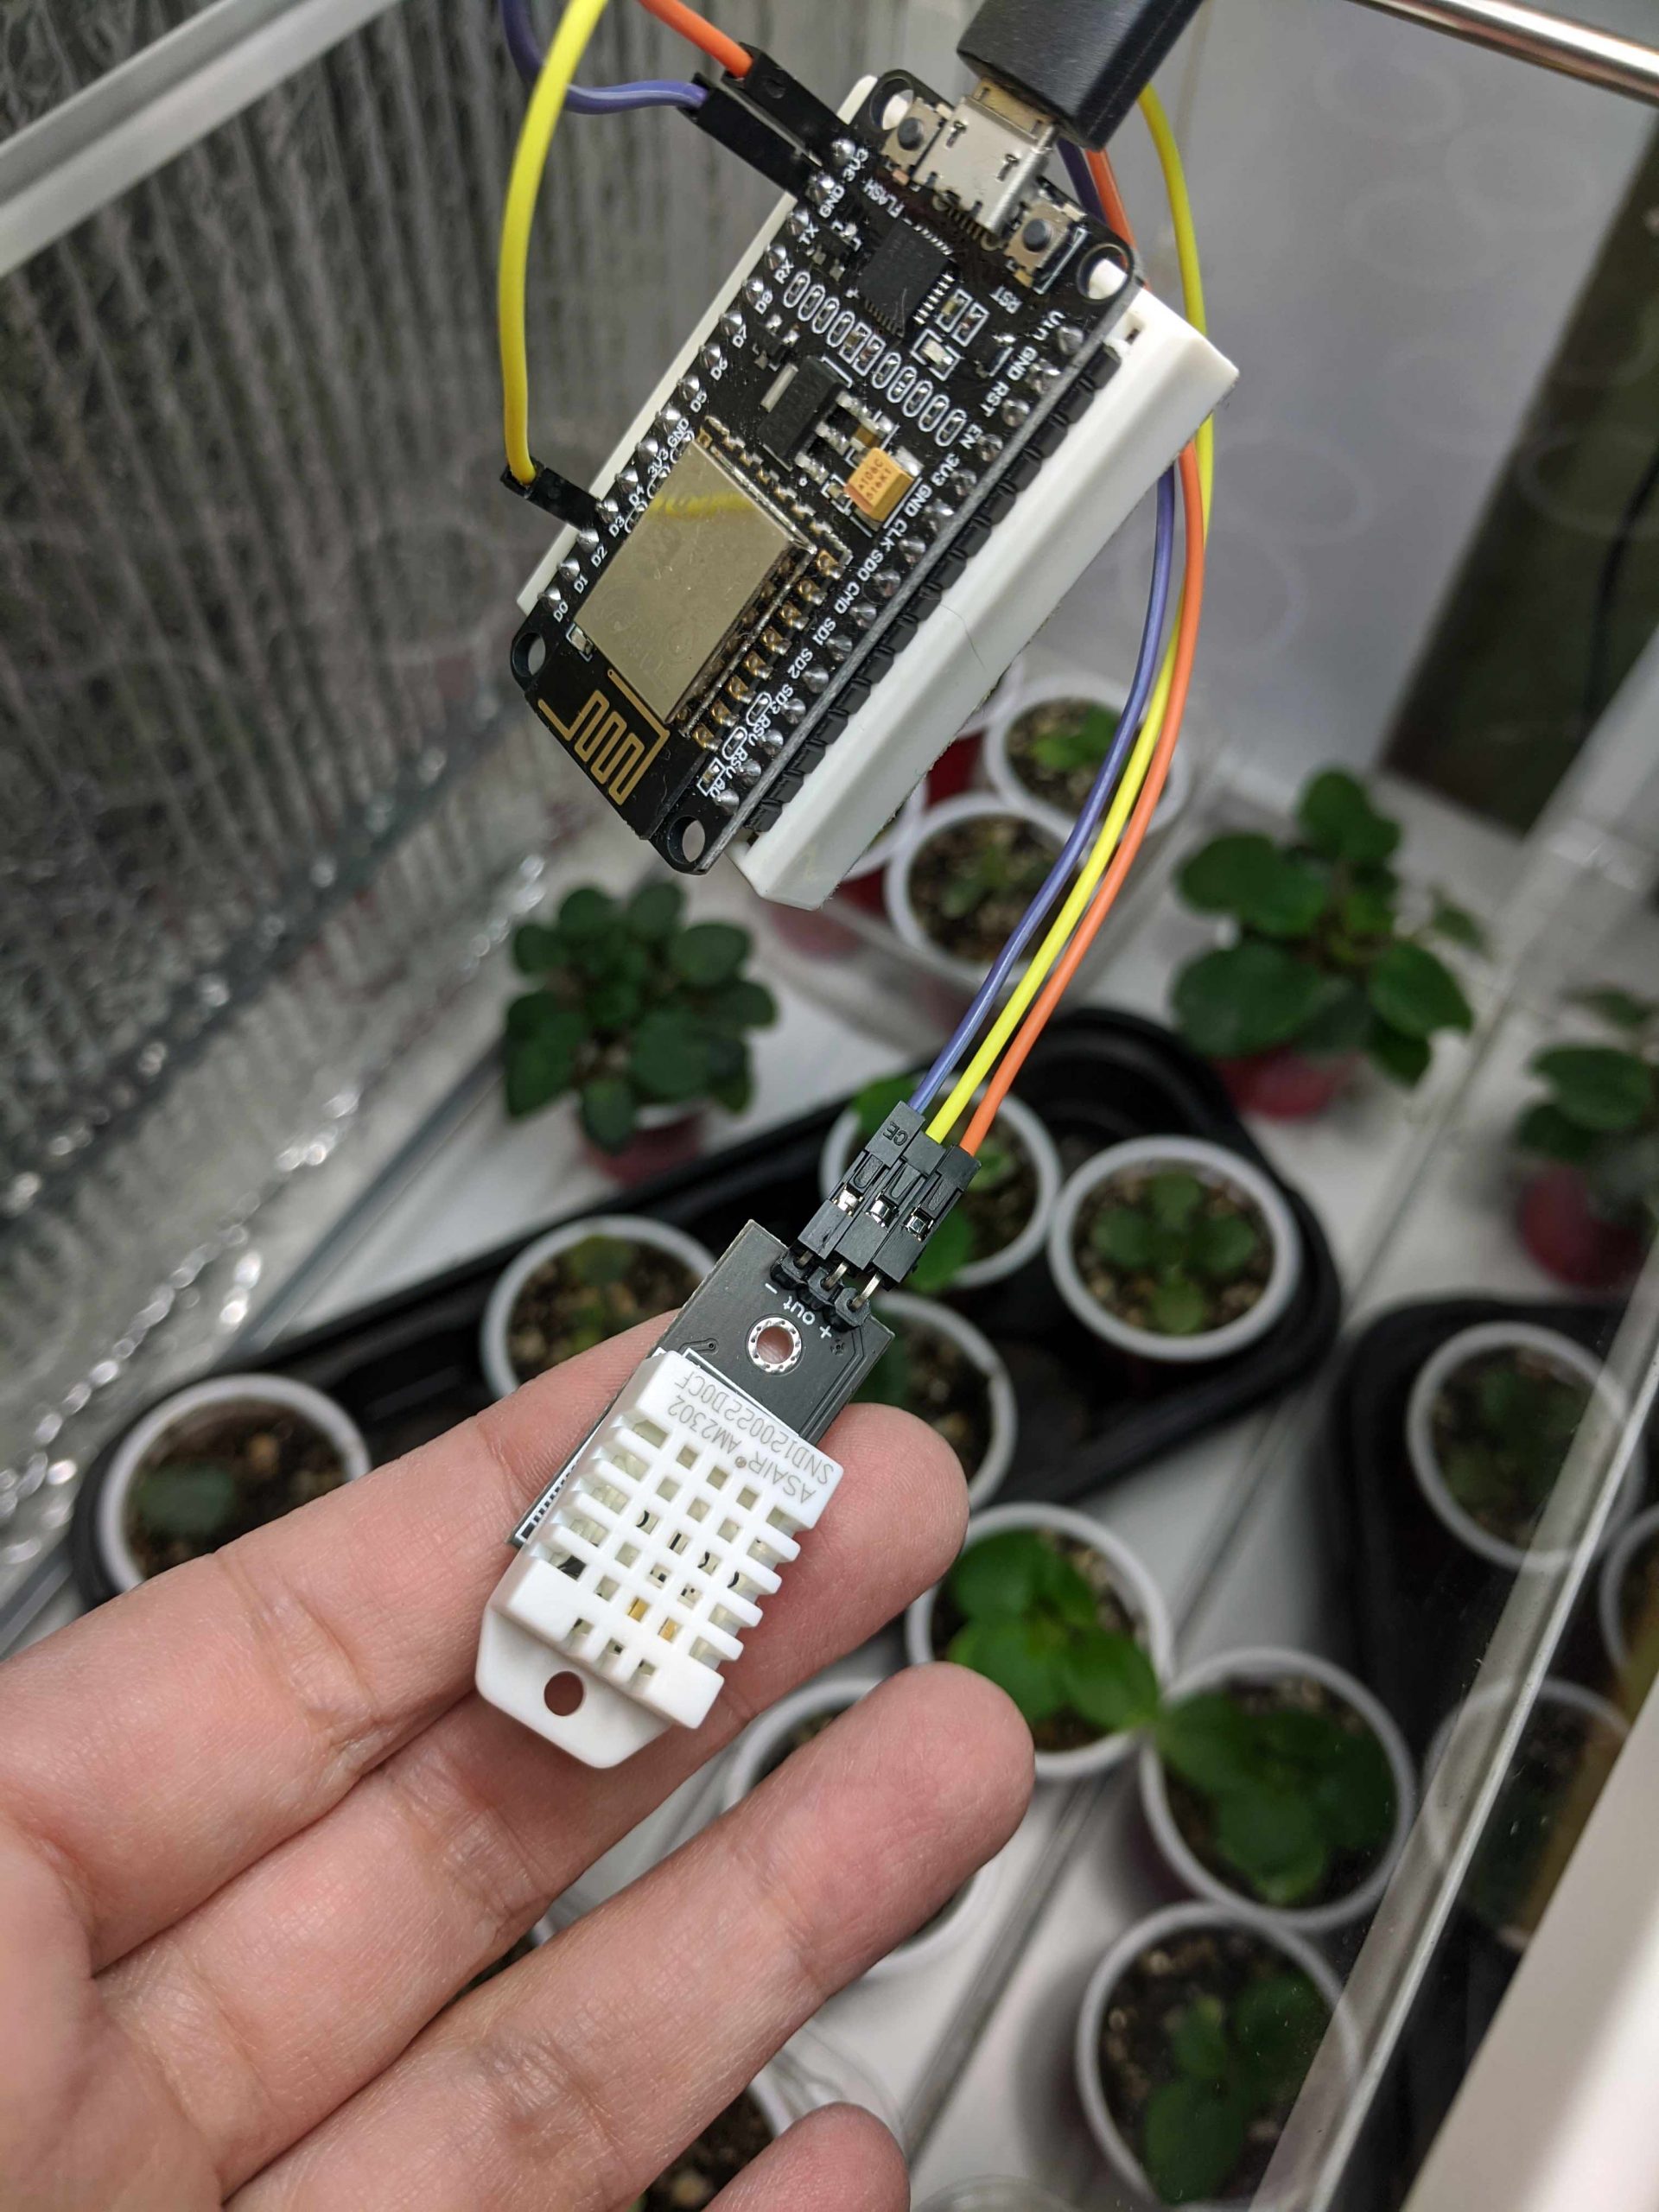
If you’re new to dev boards and Arduino here’s how to get started. Minimal coding is required and you can easily teach yourself!
Step 1: Set up third-party tools. Create an account at Adafruit.io and follow this tutorial to set up a secret key and feed. Create an account at IFTTT.com.
Step 2: Set up the hardware. Mount your board on the breadboard, hook up the DHT-22 sensor pins to 3.3V power, ground, and pin D2.
Step 3: Plug the hardware into your computer via USB. Open the Arduino IDE and install the required sensor libraries.
Step 4: Download the code, open it in the IDE and add your personal info (shown here in red).
line 5:  #define IO_USERNAME "Adafruit.io username"

line 6:  #define IO_KEY "Adafruit.io secret key"

line 23: #define WIFI_SSID "network name (2.4Ghz)"

line 24: #define WIFI_PASS "network password"
- Save and upload the sketch.
- Open the serial monitor at 115200 baud.
- Data should appear.
- If you see “nan” or another error, check your wiring and network.
- Lightly breathe on the sensor to see if values change.
- If so, your hardware setup is complete!
Step 5: Login to Adafruit.io, and create two feeds, “temperature” and “humidity”. Create a dashboard and add dials and graphs to it. You should see the data update in the dashboard.
Step 6: To set up alerts, choose “Services” from the tab at the top of the page, and follow the prompts to connect to IFTTT.com.
Step 7: Visit IFTTT.com/create. Choose Adafruit as “This” and your desired alerting method as “That”. I used email.
Optional: If you want to run this without a computer, just plug it into a USB power supply.
Next steps would be to build an enclosure for this project, or permanently solder wiring if you wish. You may also want to add other sensors like this soil moisture sensor. Have fun!